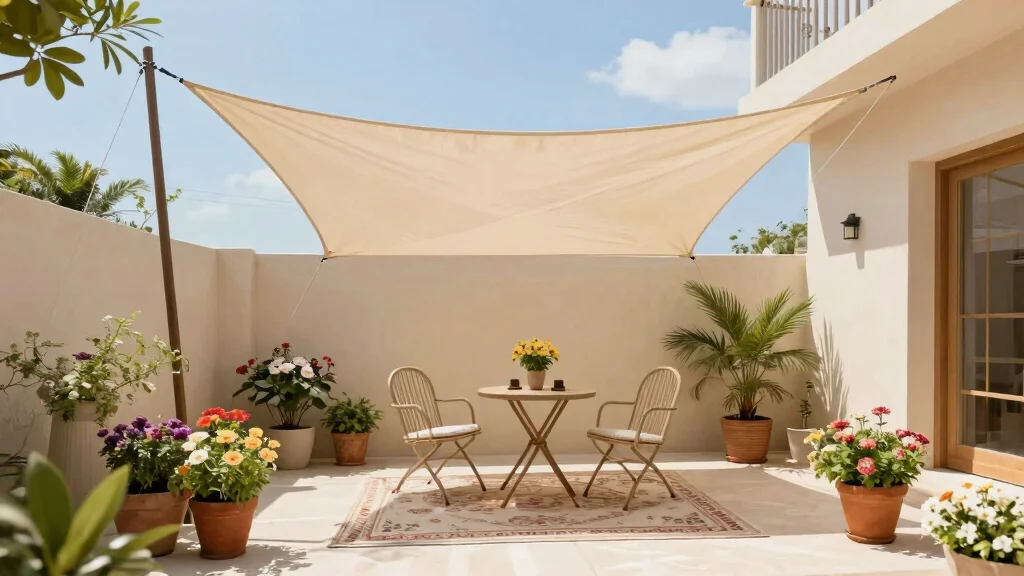
Enhancing your outdoor space is a delightful pursuit, especially when the sun blazes down on those warm summer days. If you’ve been dreaming of a cozy shaded area on your patio, you’re not alone. The quest for a perfect outdoor retreat has led many people to explore the beauty and utility of outdoor shade sails. These stylish and functional additions can transform your small patio into a comfortable oasis where you can relax, entertain guests, or simply enjoy a quiet afternoon. That’s why I’ve put together this guide on 11 Essential Outdoor Shade Sail Installation Tips (No Sag).
If you’re someone who loves gardening, DIY projects, or creating serene outdoor spaces, this post is tailored for you. You care about aesthetics and functionality. You want a shade solution that’s not only beautiful but also practical. With the right tips, you can avoid the common pitfalls of shade sail installation and achieve a flawless setup that stays taut and attractive. Whether you’re a seasoned DIYer or just starting out, this guide will provide you with actionable insights to help you install your outdoor shade sail effectively.
In this comprehensive post, you’ll discover essential tips for selecting the right materials, measuring for the perfect fit, and ensuring your installation remains sag-free. You’ll also learn about incorporating garden elements and choosing colors that enhance your outdoor experience. Get ready to transform your small patio into a shaded paradise where you can make lasting memories with friends and family!
Key Takeaways
– Choosing the Right Shade Sail Material: The material affects durability and appearance; pick one that suits your climate and style.
– Determining the Best Location: Assess sun patterns and obstacles to find the optimal spot for your shade sail.
– Measuring for Perfect Fit: Accurate measurements are crucial; miscalculations can lead to sagging and instability.
– Creating a Tensioned Installation: Ensure your shade sail is taut to avoid sagging; use proper hardware for reliable tension.
– Regular Maintenance Checks: Inspect your installation regularly for wear and tear to keep your shaded area looking great.
1. Choosing the Right Shade Sail Material
 1")
Selecting the perfect fabric for your shade sail is crucial for achieving both style and functionality. High-Density Polyethylene (HDPE) is a top choice because it’s durable and offers excellent UV protection, ensuring your outdoor space stays cool and safe from harmful rays. Additionally, breathable materials allow air circulation, which helps prevent heat build-up, making your shaded area more comfortable during hot days.
When choosing your fabric, remember that color plays a significant role too. Lighter shades reflect sunlight, keeping the area cooler, while darker hues absorb heat, creating a cozier feel. Consider thickness as well; thicker sails often provide greater durability and privacy. Always opt for materials designed for outdoor use to withstand the elements over time.
– Select HDPE or PVC for durability
– Prioritize UV protection: Aim for 90% or higher
– Opt for light colors to reflect heat
– Choose thicker fabrics for added durability
Fun fact: HDPE shade sails block up to 90% of UV rays and stay 20–30% more breathable than other fabrics. That means cooler patios and safer shade for hot days. Pick breathable color and design for real comfort.
2. Determining the Best Location
 2")
Finding the ideal spot for your shade sail is essential for maximizing both its coverage and visual appeal. Start by observing how sunlight moves across your space throughout the day to identify the best location that balances sunlight with adequate room for installation. Look for sturdy anchor points like trees or posts that can support the necessary tension for a secure, sag-free fit.
Avoid areas with overhanging branches to prevent debris from falling onto the sail. If possible, position the sail at an angle to promote water drainage during rain, keeping your shaded area functional and free from pooling water.
– Monitor sunlight patterns throughout the day
– Use strong anchor points: Trees or posts work well
– Stay clear of overhanging branches: They can cause damage
– Elevate the sail: Angle for effective drainage
3. Measuring for Perfect Fit
 3")
Taking accurate measurements is the key to a successful shade sail installation. Measure carefully from your chosen anchor points to ensure a snug fit that won’t sag. Keep in mind the shape of your sail, whether triangular, square, or rectangular, as each will have different measurement requirements.
After measuring, add a few extra inches to allow for adjustments during installation. Remember, achieving the right tension is essential; a well-measured sail will not only enhance its appearance but also its durability. Don’t hesitate to use a sturdy ladder and enlist a friend to help you reach high points for precise measurements.
– Measure twice to ensure accuracy
– Add extra length for adjustments
– Account for different sail shapes
– Ask a friend for help with high spots
4. Choosing the Right Hardware
 4")
Selecting the right hardware is just as critical as choosing the shade sail itself. High-quality stainless steel fittings are ideal as they resist rust and corrosion, ensuring longevity even in harsh weather conditions. Proper tools will secure your sail and maintain the correct tension, essential for a polished look.
Consider using turnbuckles to adjust tension after installation, allowing you to keep the sail taut over time. Additionally, sturdy mounting brackets are necessary to support the weight and strain from wind, ensuring your installation stays safe and secure.
– Invest in stainless steel fittings for durability
– Use turnbuckles for easy tension adjustments
– Choose strong mounting brackets for stability
– Ensure hardware matches the sail’s size
5. Creating a Tensioned Installation
 5")
Achieving the right tension during your shade sail installation is vital for a neat, professional appearance. Start by securing one corner of the sail to its anchor point, then progressively attach the other corners while adjusting the tension to find the right balance.
Utilize turnbuckles and tensioning systems to keep the sail taut without overstretching it. A sail that’s too loose may sag and collect water, while one that’s overly tight can tear. Regularly check the tension as you secure each corner to guarantee your sail is perfectly positioned.
– Begin by securing one corner first
– Use turnbuckles for tension management
– Avoid excessive tightness: Maintain some flexibility
– Regularly check for sagging during setup
6. Understanding the Angle of Installation
 6")
The angle at which you install your shade sail can greatly influence its performance and aesthetic appeal. Installing at a slight angle not only adds visual interest but also helps facilitate water drainage, preventing pooling during rain. A 20-30 degree angle is typically recommended for optimal results.
Ensure that the highest point of the sail is slightly elevated compared to the lower points to create a gentle slope. This not only allows rainwater to run off easily but also creates dynamic shadows, enhancing the charm of your outdoor space throughout the day.
– Aim for a 20-30 degree angle for optimal drainage
– Create a slight slope to prevent water pooling
– Enjoy dynamic shadows for a charming outdoor vibe
– Enhance aesthetics with modern angled installations
7. Regular Maintenance Checks
 7")
Regular maintenance is vital for prolonging the life of your shade sail. After storms or high winds, check for any signs of wear and tear, and ensure that all hardware remains secure and functional. Pay close attention to the fabric for frays, fading, or discoloration that may occur over time.
Cleaning your shade sail periodically is also a good idea. Use mild soap and water to gently clean the fabric, steering clear of harsh chemicals that could damage it. Consider removing the sail during winter months or when not in use to protect it and extend its life.
– Inspect for damage after storms
– Clean with mild soap and water regularly
– Look for fabric wear and address issues early
– Remove during off-seasons to protect your sail
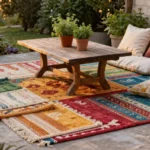
8. Incorporating Garden Elements
 8")
Bringing garden elements into your shade sail setup can elevate the ambiance of your outdoor area. Consider adding hanging planters or string lights beneath the sail to create a warm and inviting atmosphere. Training climbing plants around the support structures can also enhance the natural beauty of the space.
A stylish outdoor rug can help define the area, while colorful cushions add comfort and flair. Each of these elements contributes to a cohesive outdoor living area, perfect for relaxation or entertaining. The goal is to create a seamless blend between the shade sail and your garden for a delightful outdoor experience.
– Hang planters for added greenery
– Incorporate string lights for evening ambiance
– Use climbing plants for a natural touch
– Define the area with stylish outdoor rugs
How To Choose The Right Shade Sail Material
Choosing the right material for your outdoor shade sail is crucial for durability and performance. Different materials offer varying levels of UV protection, breathability, and longevity. Here are key criteria to consider:
1. UV Protection
Look for materials that provide high UV protection. UV rays can be harmful, so a fabric that blocks at least 90% of UV light is ideal. Polyethylene and PVC are excellent options as they are designed to resist fading and wear from sun exposure.
2. Breathability
Breathability is important to prevent hot air from getting trapped under the sail. Look for a fabric with a good weave or mesh structure that allows airflow. This will help keep your shaded area cooler during hot summer days. Breathable fabrics often reduce wind resistance too, making them less likely to sag or tear.
3. Durability
Consider how long you want your shade sail to last. Materials like high-density polyethylene (HDPE) are strong and resistant to tearing, making them suitable for various weather conditions. Check for warranties offered by manufacturers, as this can indicate the expected lifespan of the material.
4. Color Options
The color of your shade sail can affect not just aesthetics but also heat absorption. Darker colors may absorb more heat, while lighter colors can reflect sunlight. Choose a color that complements your outdoor space while considering how it will impact the temperature underneath.
5. Maintenance Requirements
Different materials have different maintenance needs. Some fabrics can be easily cleaned with soap and water, while others may require special care. Check the cleaning instructions from the manufacturer to ensure you can maintain your shade sail easily without damaging it.
Pro Tip: Always test samples of shade sail materials to see how they hold up against the elements in your location. This can help ensure you make the best choice for your outdoor space!
9. Color Choices and Their Effects
 9")
The color of your shade sail significantly influences not just aesthetics but also the comfort of your outdoor environment. Light-colored sails are great for reflecting sunlight, keeping the area cooler, which is especially beneficial in hot climates. Conversely, darker shades can create a cozy atmosphere, absorbing heat and making them ideal for cooler months.
Choose colors that complement your existing outdoor decor for a cohesive look. Bold colors can serve as eye-catching accents, while muted tones can harmoniously blend with nature. Remember to select UV-resistant fabrics to ensure the colors maintain their vibrancy over time.
– Light colors help keep spaces cooler
– Dark shades absorb warmth for cozy vibes
– Pick colors that complement your decor
– Opt for UV-resistant fabrics for lasting color
Color isn’t just style—it’s comfort you can feel. Light sails bounce heat away, while deeper tones wrap your space in cozy shade. These outdoor shade sail installation tips start with color: choose hues that complement your patio and use bold accents for practical, eye-catching charm.
10. DIY Installation vs. Professional Help
 10")
Choosing between a DIY installation and hiring professionals is a common consideration. If you enjoy hands-on projects, installing your own shade sail can be rewarding and budget-friendly, allowing you to personalize your outdoor area. However, if you feel uncertain about the installation process or lack the necessary tools, it may be wise to seek professional assistance.
Weigh the advantages of each approach: DIY installations provide flexibility and cost savings, while professionals ensure a perfect, taut finish and handle all the technical aspects. Consider your skills and desired outcomes to make the best choice for your situation.
– DIY offers personal touch and cost savings
– Professionals ensure expert installation
– Assess your skill level honestly
– Balance the cost and quality of installation
Fun fact: DIY shade sail projects can cut up to 50% of installation costs when you already own basic tools. For outdoor shade sail installation tips, this hands-on approach adds flexibility and real satisfaction.
11. Enjoying Your Shaded Space
 11")
Once your shade sail is beautifully installed, it’s time to relish your newly shaded retreat! This tranquil space can become your favorite spot for relaxation, reading, or dining outdoors with friends and family. Enhance comfort by adding cozy seating, a small table for snacks, or even a fire pit to elevate the experience.
Think about how you can personalize this shaded area further. Outdoor cushions, decorative throws, or charming lanterns can add to the ambiance. The key is to create a space that feels welcoming, reflecting your personality and offering a delightful escape from everyday life.
– Create a cozy seating nook with cushions
– Add lighting for a warm evening glow
– Personalize with decor that reflects your style
– Utilize the space for both relaxation and socializing
Conclusion
 12")
Installing a shade sail is a rewarding project that can elevate your outdoor space into a cozy haven. With these essential outdoor shade sail installation tips, you’re now equipped to choose the right materials, create the perfect fit, and maintain your installation. So, gather your tools, get creative, and enjoy the beautiful, shaded refuge you’ve created!
Explore your garden and see how you can enhance it further with thoughtful touches. Remember, your outdoor space should be an extension of your home, a place to relax and enjoy nature.
Note: We aim to provide accurate product links, but some may occasionally expire or become unavailable. If this happens, please search directly on Amazon for the product or a suitable alternative.
This post contains Amazon affiliate links, meaning we may earn a small commission if you purchase through our links, at no extra cost to you.
Frequently Asked Questions
What are the essential outdoor shade sail installation tips to prevent sag on a small patio?
Here are practical outdoor shade sail installation tips to prevent sag on a small patio.
For no sag, plan your layout first and pick solid anchor points.
Attach the sail to higher points and pull each corner taut with turnbuckles.
Use sturdy anchors like screwed eye bolts or brackets into solid framing rather than lightweight posts.
Aim for a slope of about 20–30 degrees to aid drainage and tension.
After mounting, test each corner and re-tighten if needed.
Choose a high-quality, UV-rated outdoor shade sail fabric and hardware to keep its shape over time.
How do I choose anchor points and set the tension to keep my shade sail taut?
Choose anchor points that are structurally solid and capable of bearing wind load. For a taut layout, attach the sail to higher points on the house or pergola and a bit lower on the opposite corners to create tension. Use corrosion-resistant turnbuckles or tensioners and snug them gradually.
Avoid over-tightening fabric edges; aim for even tension around the sail.
Check wind exposure and adjust as needed.
What materials and hardware do I need for a DIY shade sail installation on a small patio?
Key materials and hardware for a DIY shade sail installation on a small patio include: a outdoor shade sail fabric rated for sun exposure, UV-stable anchors (eye bolts or brackets), stainless steel turnbuckles, heavy-duty webbing or cable, shackles, and protective edge hardware. You’ll also need mounting tools, like a drill for masonry or wood, and weatherproof sealant as needed. Make sure all hardware is rated for the sail size and local wind loads.
How can I plan angles and drainage for an outdoor shade sail on a small patio?
Plan the sail with a gentle slope to promote drainage and reduce sag.
A typical target is a 20–30 degree incline from one side to the opposite edge.
Position anchors on solid structures and avoid collecting water above seams.
Drainage helps extend fabric life and keeps the shade looking crisp in your gardening shade solutions setup.
What are common mistakes that cause shade sails to sag and how can I avoid them?
Common mistakes include underestimating the required slope, using light-weight hardware, mounting on weak posts, and failing to re-tighten after wind or rain.
To avoid sag, ensure a proper 20–30 degree slope, secure anchors into solid framing, use sturdy turnbuckles, and re-tighten corners after storms.
Regularly check for fabric wear and ensure water drains away from walls and furniture.